

Adding Your Course to WeTynk
Once you've created your product with WeTynk Labs, the next step is to add it to your WeTynk account.
In this guide, you'll learn how to create your product, add its information, configure how customers will receive it, and set its price and support details.
1. Add a new course
From your WeTynk dashboard, open the navigation menu and go to:
Courses → Add Course
You'll first be asked:
What do you want to sell?
Choose the type of product you're creating.
Online Course
Video lessons organized into modules.
Ebook
Downloadable PDF material.
Community
Access to an exclusive group.
Software
Access to a tool or app.
Files
Templates, spreadsheets, documents, and other files.
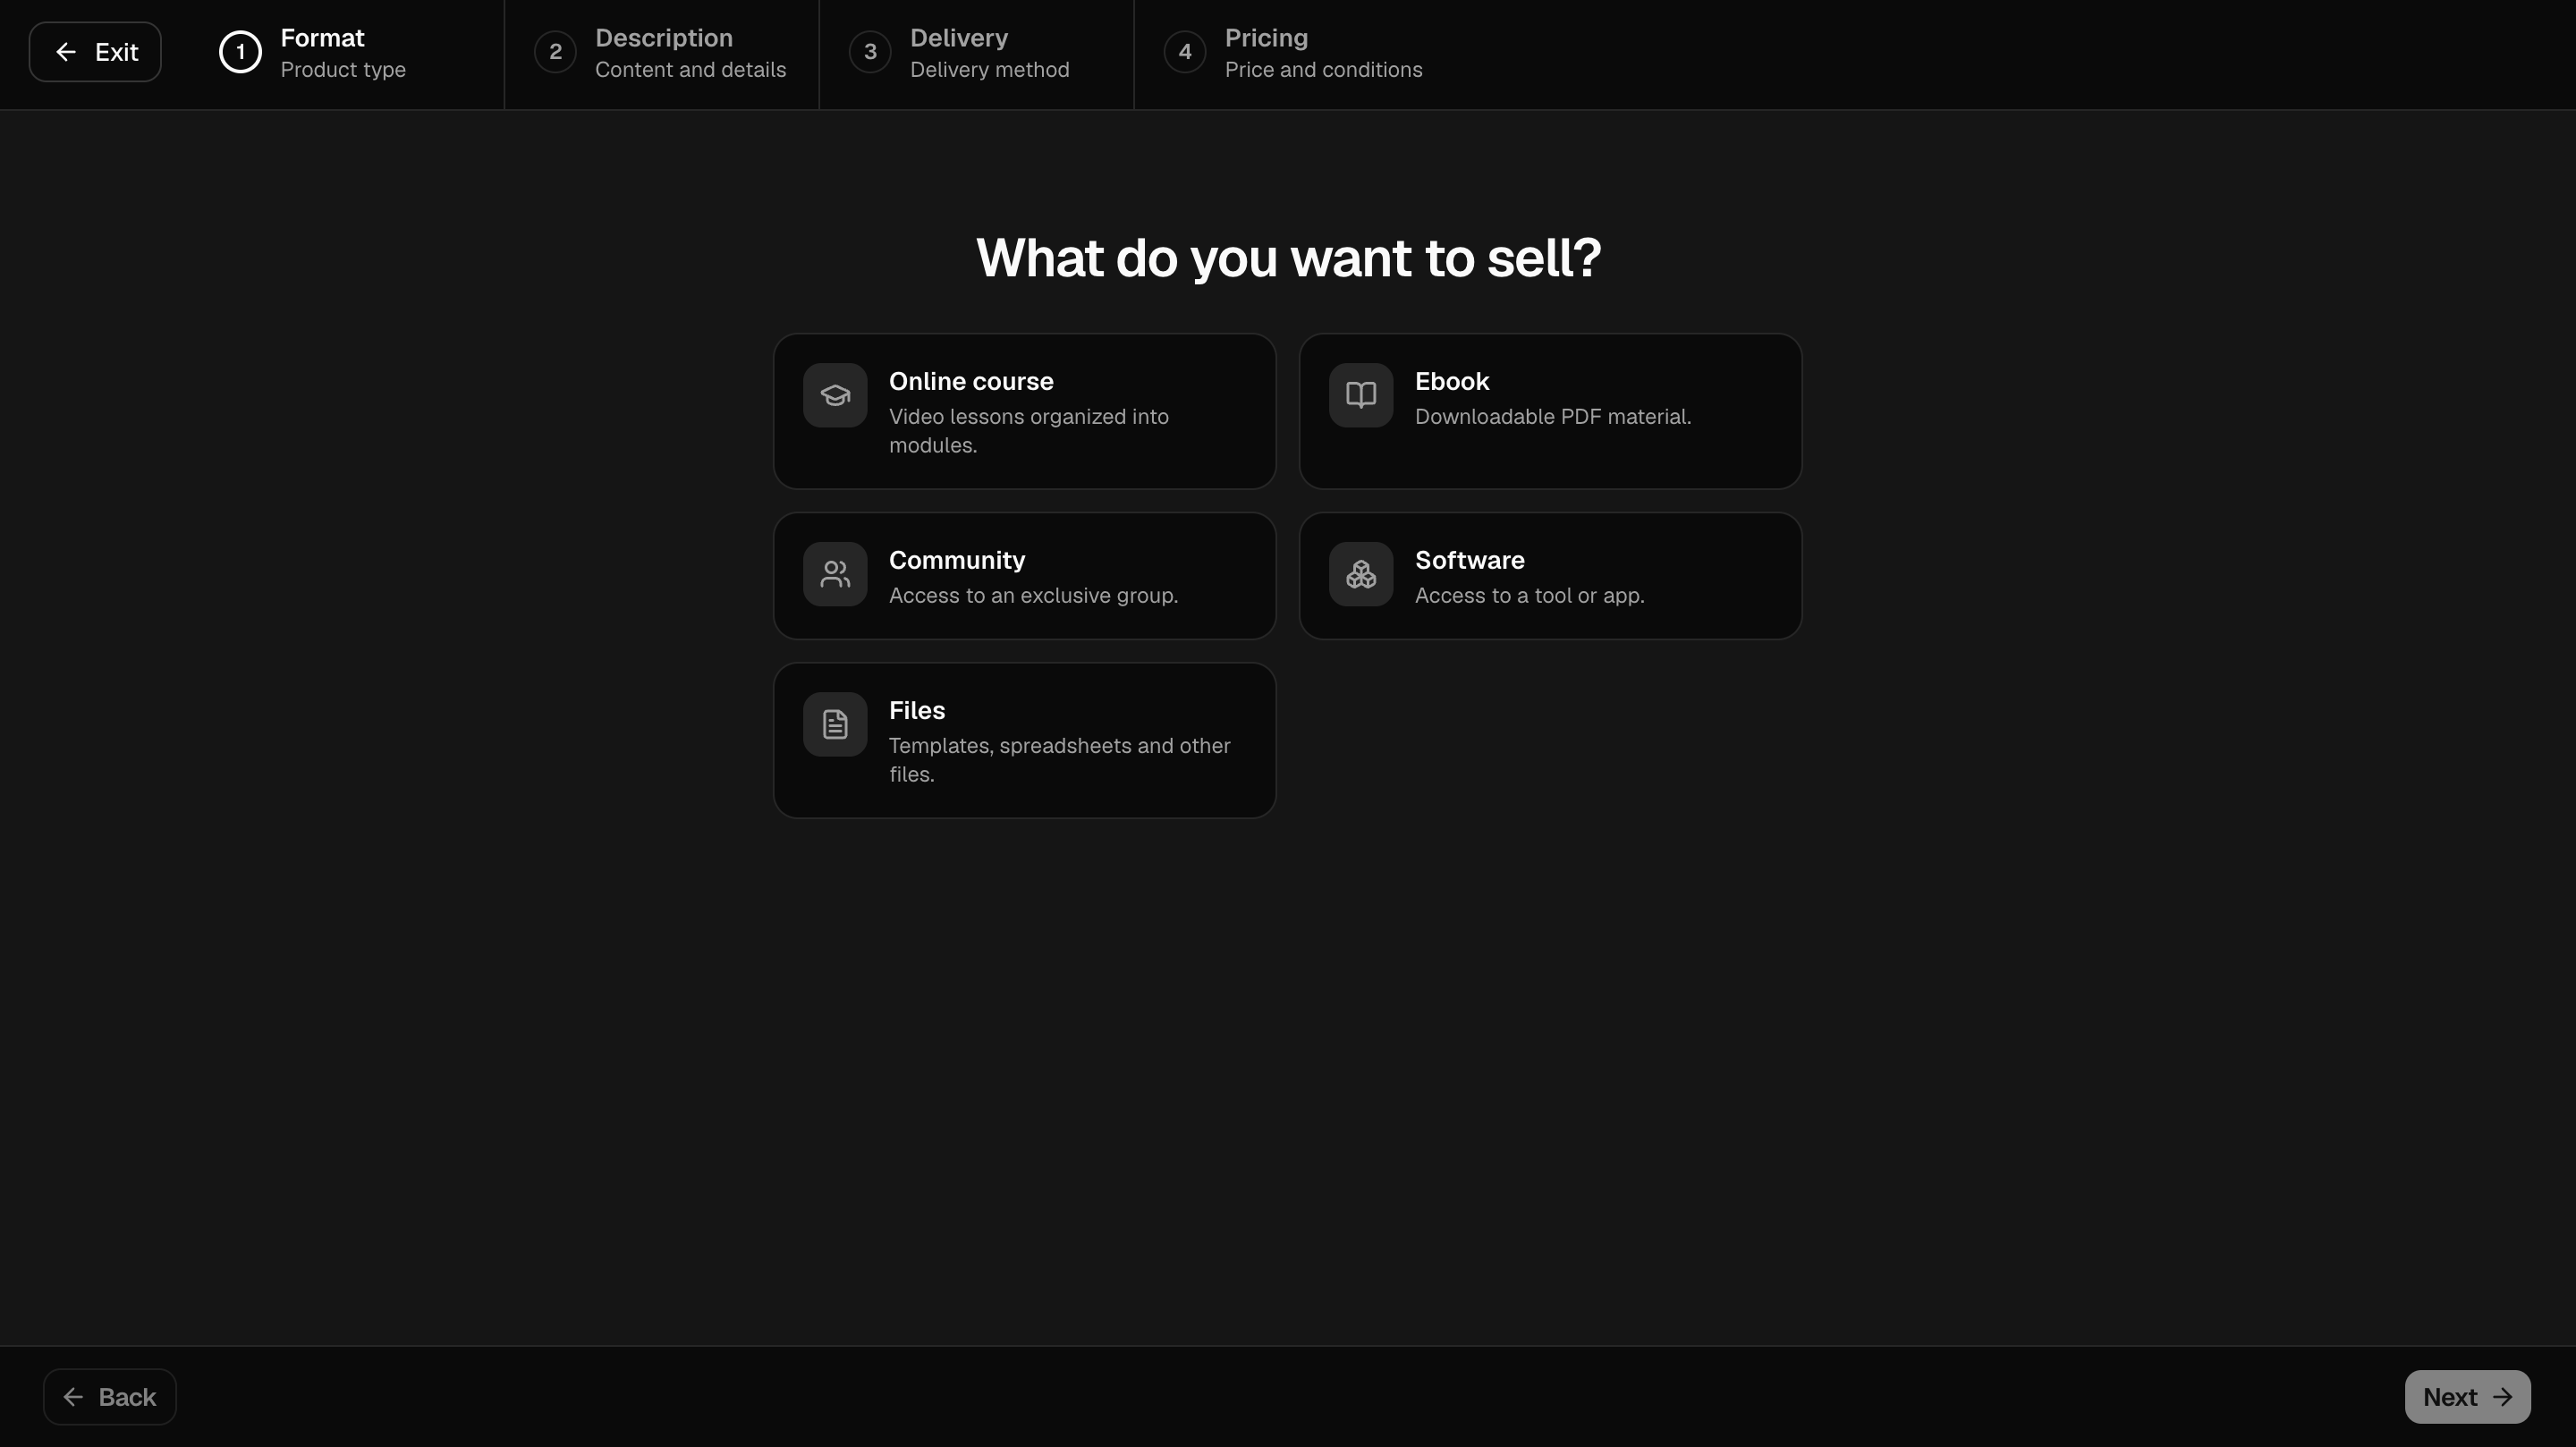
Select the option that best matches your product and continue.
2. Add your product information
Next, you'll provide the basic information about your product.
You'll need to add:
Product name
Enter the name customers will see for your product.
Choose a clear name that immediately communicates what the product is about.
Category
Select the category that best describes your product.
This helps organize your products and can also make it easier to manage them later.
Description
Add a description of your product.
Use this space to explain what your product is, what customers will get, and what they can expect from it.
Product image
Upload an image that represents your product.
This image may be displayed across your WeTynk experience, so we recommend using a clear and professional product cover.
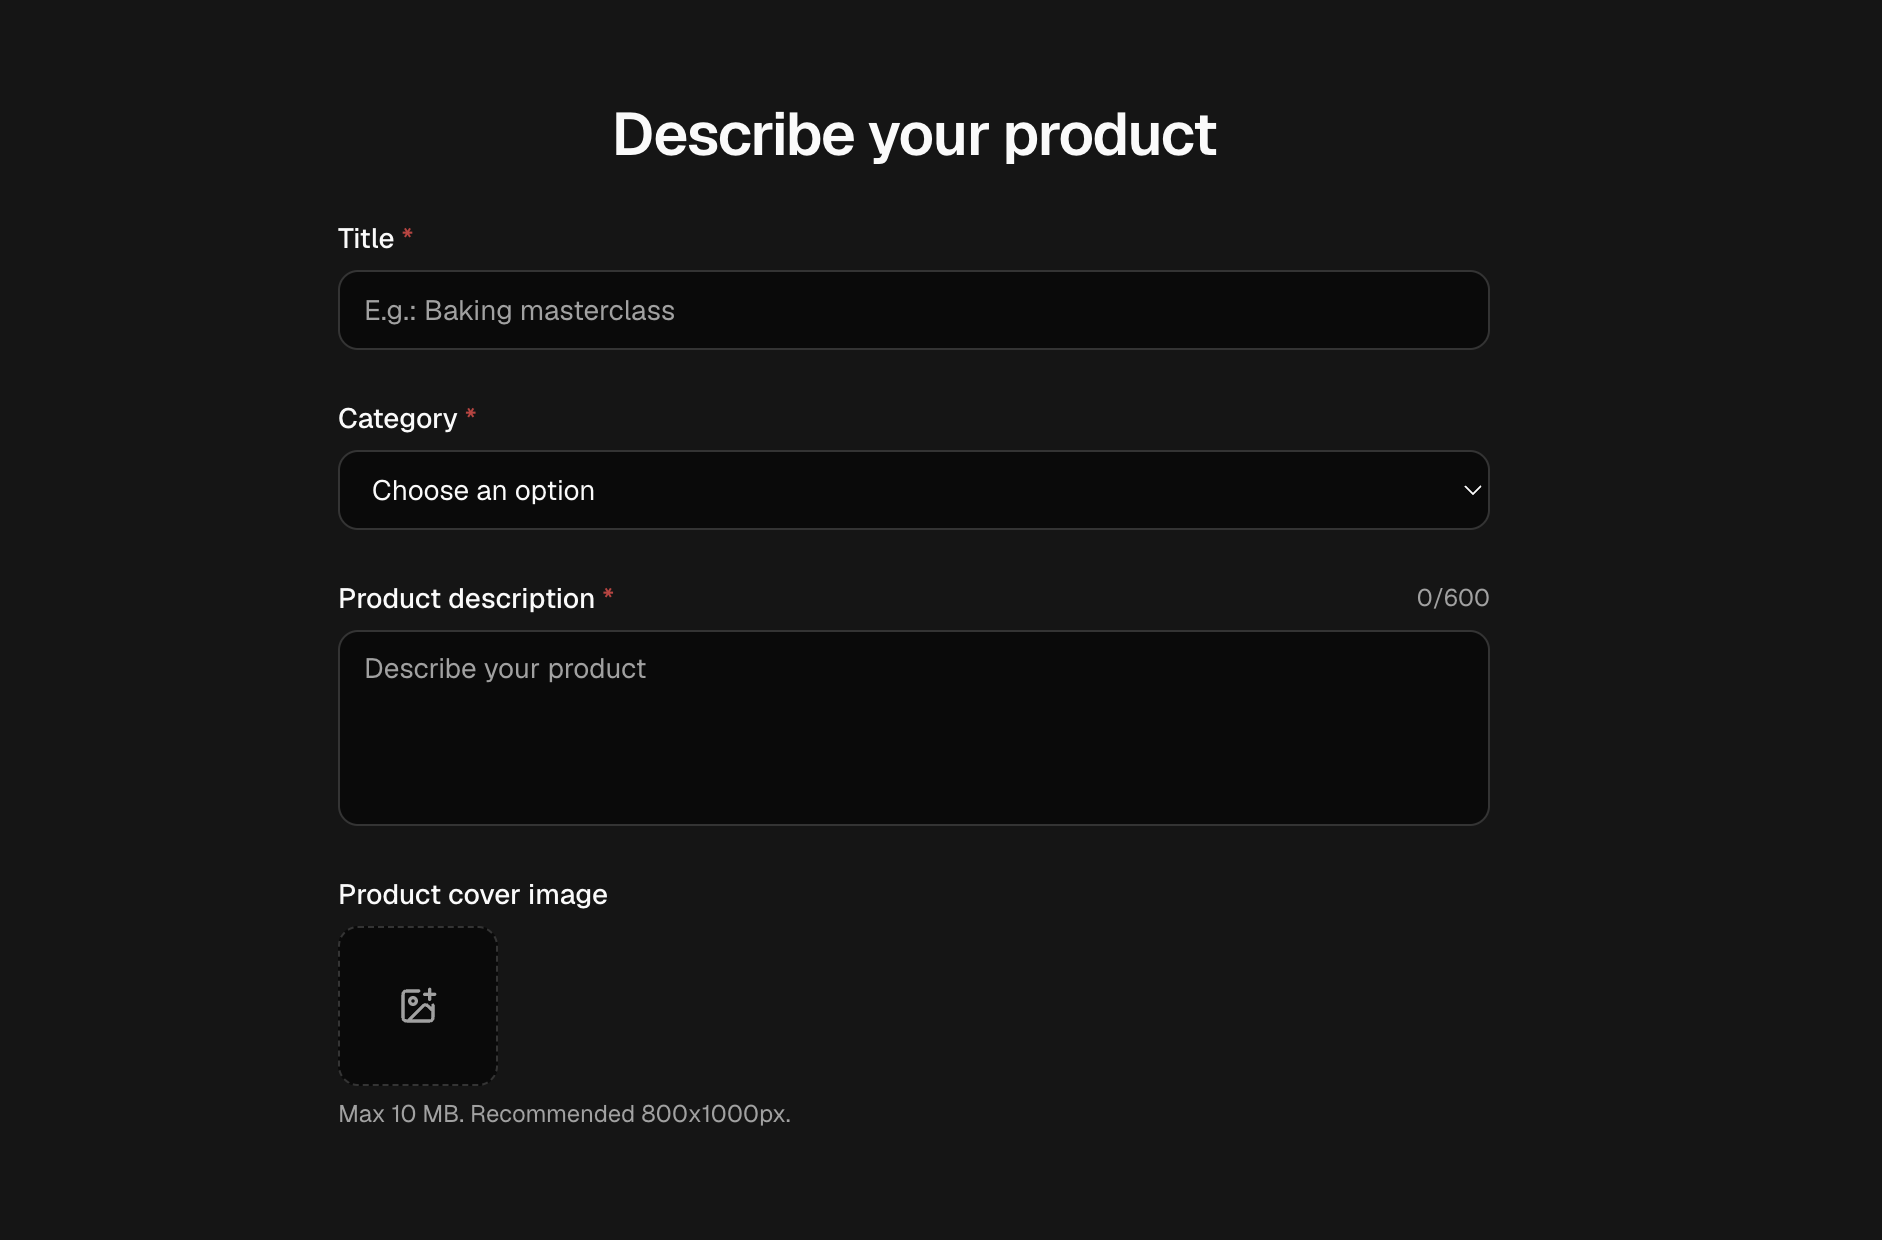
Once you've filled in the information, continue to the next step.
3. How will the customer receive it?
This is one of the most important steps when creating your product.
You'll need to choose how your customers will receive what they purchased.
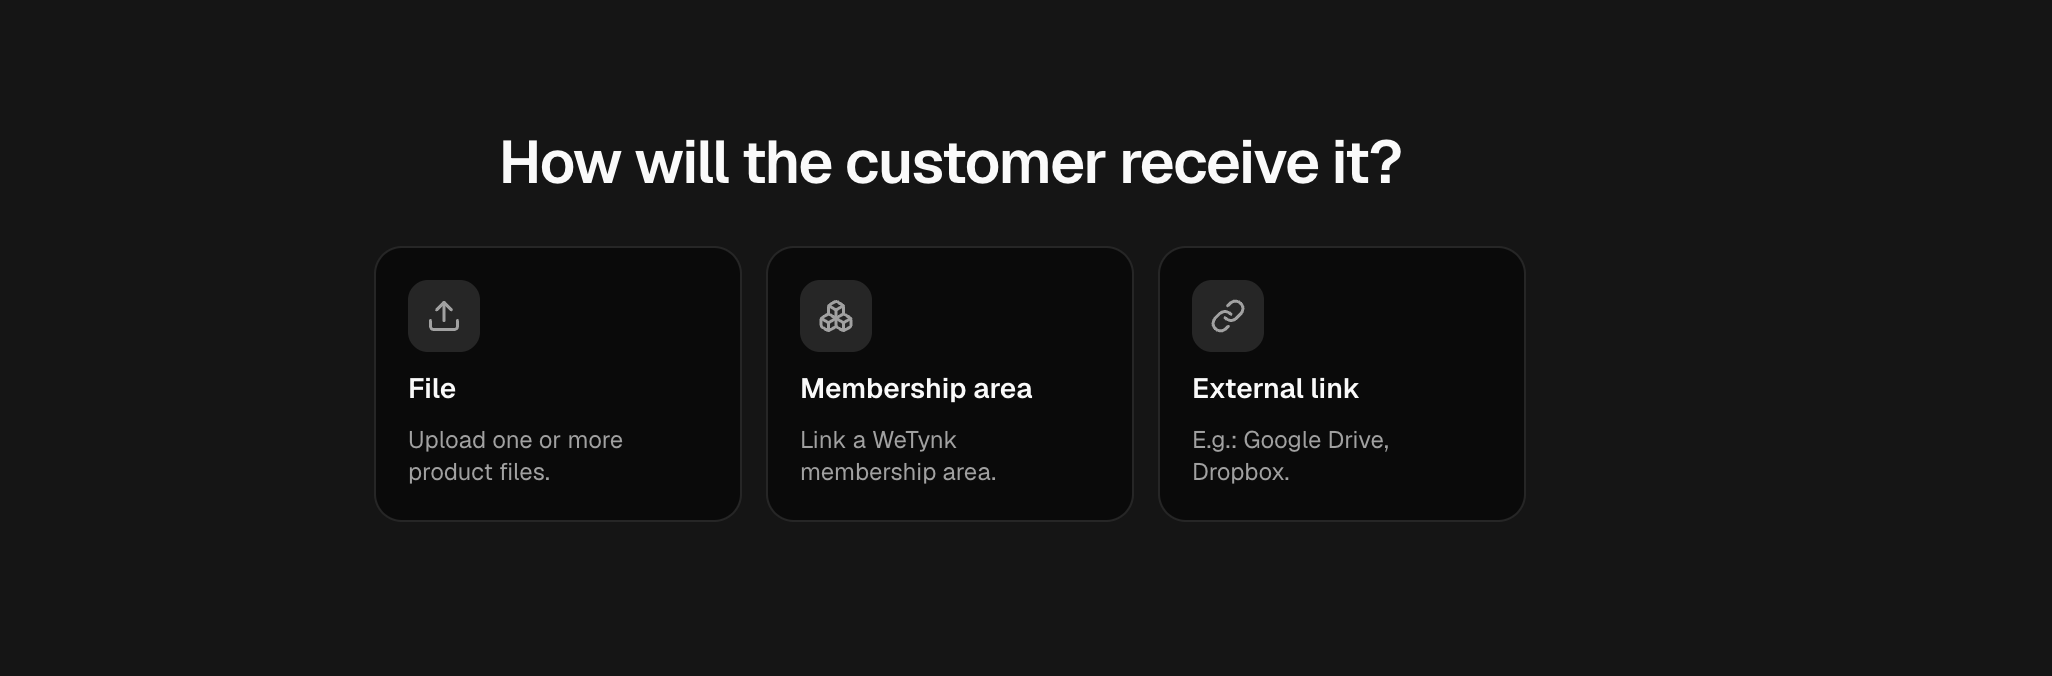
You can choose between three delivery methods.
File
Use this option when you're delivering downloadable files directly through WeTynk.
This is useful for products such as:
PDF ebooks
Spreadsheets
Templates
Documents
Other downloadable files
Upload the file you want your customers to receive after purchasing.
Member Area
Use a Member Area when your product requires customers to log in and access content inside WeTynk.
This is ideal for:
Online courses
Video lessons
Content libraries
Communities
Products with multiple pieces of content
Important: A Member Area must be created before you can use it as a delivery method.
If you haven't created one yet, follow the Creating a Member Area guide before continuing.
External Link
You can also deliver your product through an external link.
For example, you may use a link to:
Google Drive
An external download page
Another platform
An external resource
Important: External links and product compliance
External links may be monitored for security, abuse, fraud, scams, or other policy violations.
Only use links that you own or are authorized to distribute.
Links that lead to scams, fraudulent content, malicious material, unauthorized products, or other prohibited activity may result in enforcement action, including account suspension or termination and the retention of funds associated with affected transactions, in accordance with WeTynk's policies.
If you're unsure whether an external link is appropriate, use a direct file or WeTynk Member Area whenever possible.
4. Set your price and support information
The final step is to configure your commercial and support details.
You'll be asked to provide:
Product price
Set the price customers will pay for your product.
Make sure the price matches the offer you're presenting on your sales page.
Discount coupon
You can create a discount coupon for your product.
Coupons can be useful for promotions, launches, special offers, or campaigns.
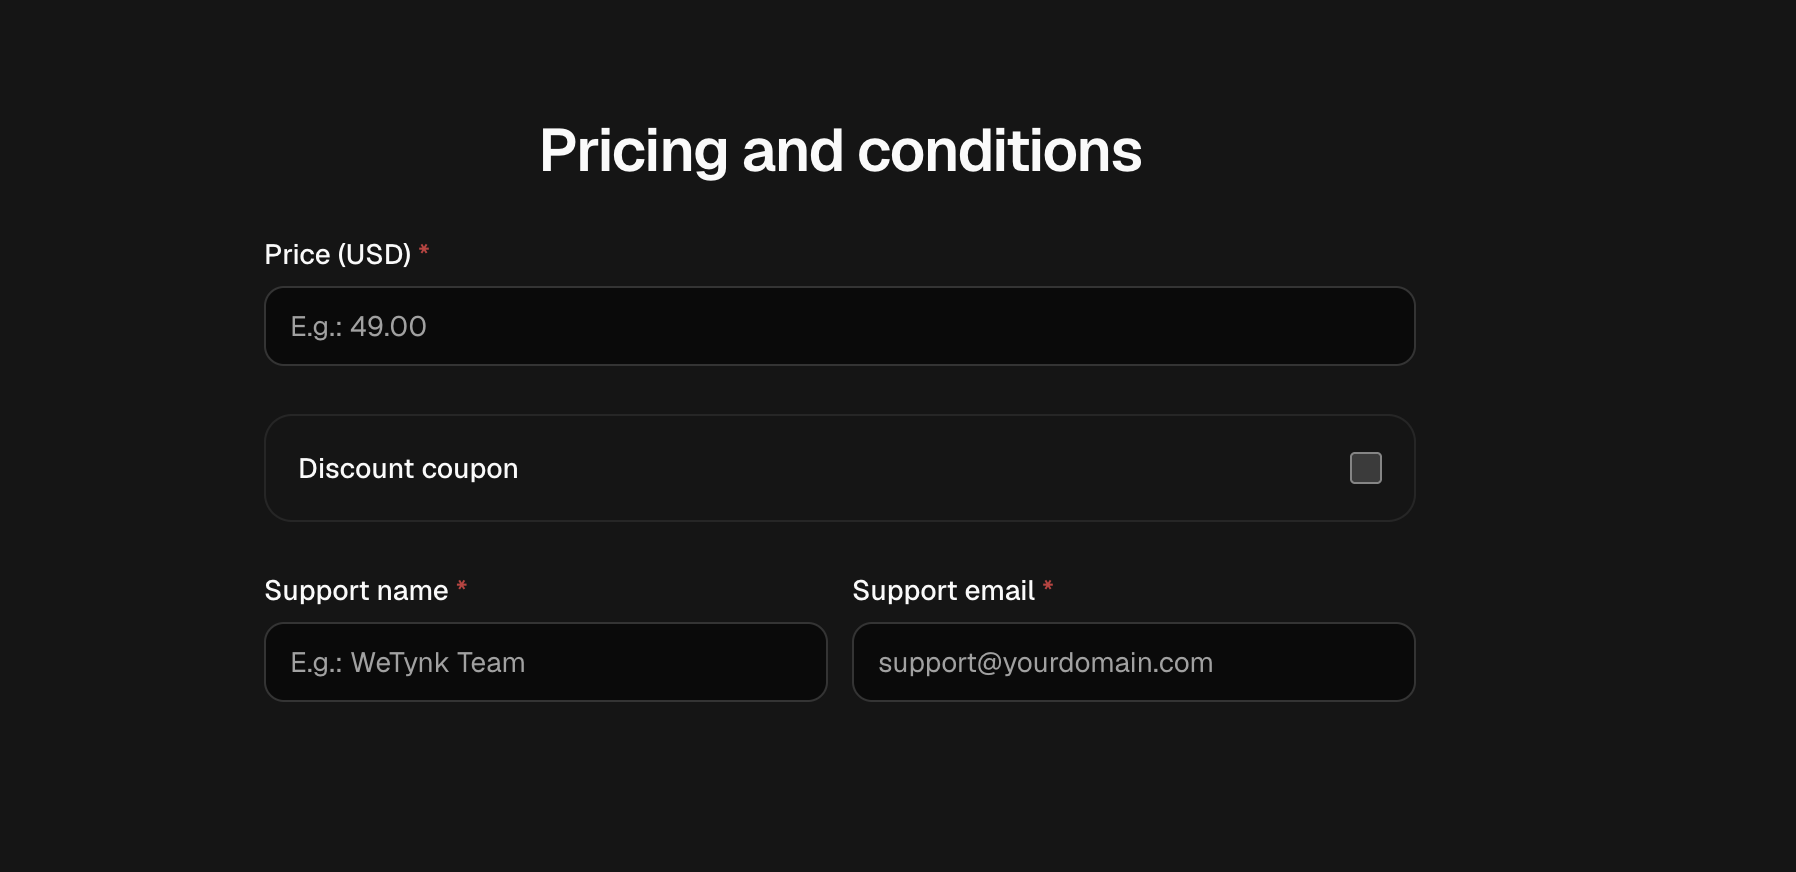
Support name
Enter the name customers should see when they need help with their purchase.
This can be your name, your business name, or the name of your support team.
Support email
Enter the email address customers can use to contact you about their purchase.
Make sure this is an email address you actively monitor.
Customers may use this address for questions about access, downloads, or other issues related to their purchase.
Review and create your product
Before finishing, review all the information you've entered.
Make sure that:
Your product name is correct
The category is appropriate
Your description is complete
Your product image is uploaded
Your delivery method is configured correctly
Your files or links work
Your price is correct
Your coupon settings are correct
Your support information is accurate
Once everything looks right, create your product.
Your course or digital product is now registered on WeTynk.
What's next?
Your product is now inside your WeTynk account, but there are still a few things you can configure before you're ready to sell.
The next step is to customize and configure your course.
Continue with:
Configuring Your Course
Learn how to organize your course content, configure your modules and lessons, and prepare the customer experience.
More in Getting Started
Welcome to WeTynk
A quick overview of what you can do on the platform.
Creating your product with WeTynk Labs
Have an idea for a digital product but don't know where to start? WeTynk Labs helps you
Configuring Your Product
After creating your product, you can customize how it's delivered, how customers purchase it, and how your product appears across WeTynk.